
Woodturning with Brendan Venner

Recently Brendon Venner demonstrated techniques he applies in his woodturning ‘life.’
Brendon showed a complex musk burl bowl about 180 mm in diameter with protruding ‘legs and flanges’ accomplished using AutoCad Computer Design to draw his proposal and then develop an initial design, while on the
computer, to give the best design possible as well as getting what he wants from the turning. Printing the Cad plan full size, and turning a prototype bowl in radiata pine, also allows scope for further design improvement prior to working on the musk blank. These planning and design stages generally take some weeks, prior to turning!

For this turning the bowl profile giving the best viewing was elliptical and completed by turning to the diameter of the ‘protruding four arms’ and routering away the wood between to get the desired result. The bowl’s inside was turned normally. While Brendon uses AutoCad Design he recommends DraftSight Draw Tools as more than satisfactory and is free from the web.
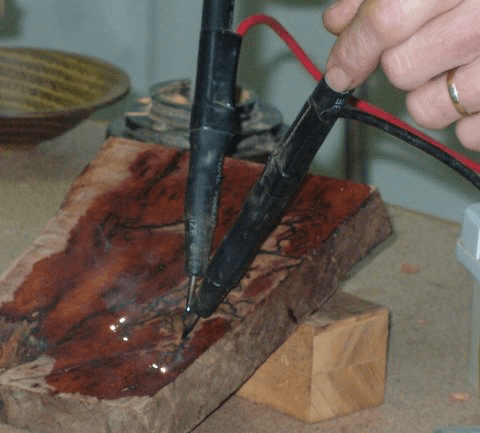
Brendan introduced us to fractal burning, known as Lichtenberg Fractals these patterns add substantially to the detail carried on this turning. Brendon demonstrated this ‘electrical’ technique on a number of different woods.
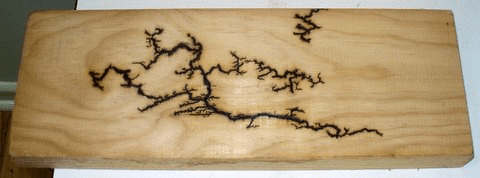
For the equipment a 10,000 volt neon sign transformer is required. This is connected via insulated and approved cables to electrodes of steel. The wood is made conductive (particularly for dry wood) by rubbing into the surface an electrolyte which can be any ‘chemical salt’ solution such as baking powder (~10 g per 200 ml or straight Pepsi etc) which is allowed to absorb into the wood before commencing. Connect one terminal (electrode) permanently to the wood turn on the power and carefully move the other over the wet wood surface to give fractal patterns as desired. Beware of the bare metal electrodes or these will soon remind you with a nasty shock. By adding an input voltage regulator, in this case a sewing machine pedal controller, the ‘ferocity’ of the burn can be moderated allowing finer fractals. When finished clean away the burnt wood/charcoal with a fine brush and sponge completely free of electrolyte, dry and finish as usual. Remember caution is necessary with this technique as electrocution is not entirely unknown!

Surface colouration was next demonstrated. As an example a small pine goblet was turned externally and air brushed with a number of contrasting colours along the turning. Once the paint is dry, spray and seal with two coats of clear gloss lacquer and once dry artistically glue hot melt from a glue gun over the length of the goblet. Wait for the hot melt to set and harden. Spray completely with black acrylic semigloss ensuring that there are no coloured shadows remaining, and allow to completely dry, say 6 to 8 hours. Carefully remove, by hand and/or with a scalpel, all the hot melt glue to expose the colour below the glue. Spray with a top-coat satin finish clear acrylic lacquer and when dry polish the goblet with a wax polish to finish.
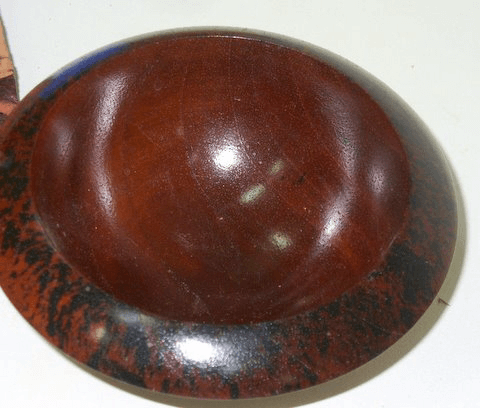
For platters with a wide flange of colours and a smaller diameter internal bowl start with the basic design allowing a flange of approximately 80 mm wide. Sand to 400 grit and paint the entire surface with black spray acrylic as a contrasting base. Mark out the diameter where the centre of the platter is to be turned down and ‘preserve’ it. On the remaining annulus flange ladle multiple 1 ml quantities of Acrylic Flow Medium all around to form a pleasing patten. Add acrylic colouring, drop by drop (to give a 50:50 mix), to each flow medium ‘blob’ and use the dry air brush to blow these various coloured blobs into each other and/or around the flange to give a random wavy effect which when dried and sealed will give a spectacular result. The colours used should be Joe Sonyas ‘Iridescent’ type or equivalent to give the result shown on the platters. Once the colours on the flange have been completed turn out the ‘preserved’ centre of the platter, sand and seal to
finish the turning. The Flow medium can be substituted with water to cover a larger area which if immediately covered with Gladwrap and pummelled with the fingers to cover the complete black base can give an outcome not dissimilar to the previous platter. Also flick colouration using a toothbrush can be used to give another interesting result, including the Australian cedar ‘flick ebonisied’ bowl shown. Checkout similar ideas from Gary Low’s You-Tubes https://youtu.be/S2lB4Smq6TI. It is noted that Brendon was using the air brushing system available recently from Aldi Stores for approximately $80.
A big thank you to Brendan for his fascinating demonstration.
